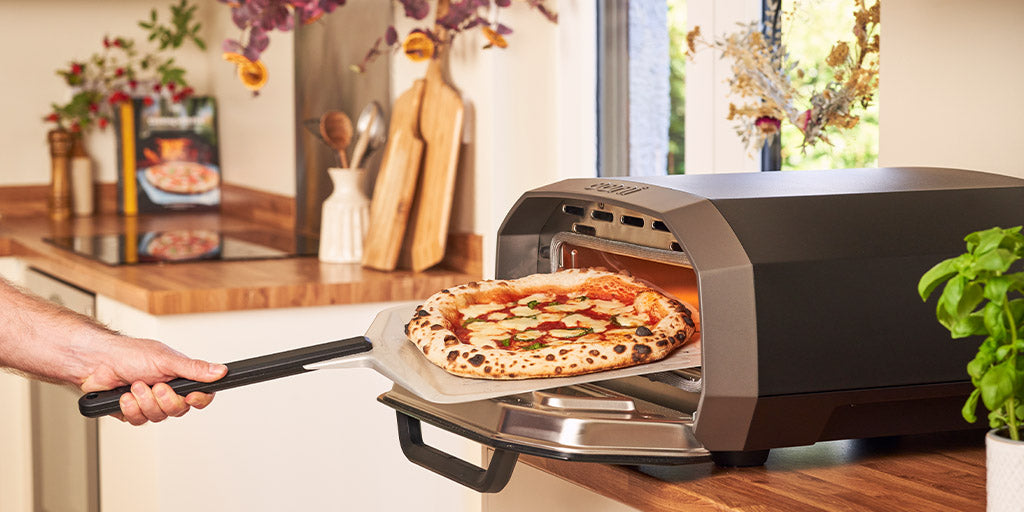
A question that we often get from people when they first start making pizza at home is about how to get their dough off of the peel and into their Ooni. This is called ‘launching,’ and if it sounds tricky or if the process has already challenged you, don’t worry – it’s an easy skill to master. The most important thing here is to practice making dough and cooking pizza – with a little effort, time, and a healthy appetite, you’ll be cooking fantastic pizzas in no time! We've developed some essential tips to help you hit the ground running. Before you know it, you’ll be on your way to hosting a great pizza party.
Note: All of these tips will be useful whether using a wooden peel, a perforated peel, or prepping on a separate surface.
Watch our latest video on launching pizzas to see the tips demonstrated, and get an extra tip as well!
1. Choose the right flour
There’s more than one way to make a pizza, but one thing remains the same: flour. While there are many types – from “00” and gluten-free to bread and whole wheat – we’ve taken the guesswork out of it with our handy guide to help you find the right match.
2. Start with the basics
Once you have the right flour, you’ll need a stellar dough recipe. For beginners, we recommend starting out with our Classic Pizza Dough, which is simple and easy to follow and only requires three to four hours of proofing. If you’re really pressed for time, try out our Quick Pizza Dough, which only needs one hour. And no pizza (unless you’re going for a white pizza, of course) is complete without a Classic Pizza Sauce.
3. Stretch at room temperature
After you’ve made your dough, you’re ready to stretch your pizza. Pizza dough is easiest to work with at room temperature, so if you’ve opted for a cold proof, give it at least 4 hours out of the fridge before cooking. If your dough is too cold, it will be hard to work with and spring back in on itself. On the other hand, if it's too warm, it may start to sweat (causing it to stick to the peel) or stretch too far and tear easily.
4. Work with two peels
When making pizza, you’ll have a much smoother experience if you keep your peel and ingredients at room temperature, and using two peels simultaneously can help. Reserve one as a “prep peel” (for building the pizza and launching it into your oven) and one as a “‘warm peel” (for turning and retrieving hot pizza). This guarantees that your prep peel is always at room temperature and doesn’t get hot from moving around inside the oven. It also prevents the dough from softening quickly, which can cause it to stick to the peel and become challenging to work with.
5. Flour everything and check for holes
Before you stretch out your pizza, flouring your hands, the surface you’re working on, and the peel are essential. Once you’ve stretched out your base, check for holes – any moisture that gets between the peel and the dough will cause your dough to stick. If you find any small holes or tears, simply pinch the holes together gently. If the holes are too big to fix, don’t worry: it’s the perfect opportunity to make a Recovery Calzone!
6. Stop and shake
Once you have your stretched pizza base on your peel and think you’re ready to add sauce and toppings, our advice is to stop. Instead, we always recommend picking up your peel and giving it a shake. If the dough sticks to the peel and won’t budge, simply pick up the edge of the dough and throw a little more flour on the peel. You won’t be able to do this once sauce and toppings have been added, so time is of the essence here!